How to
How to create a website with AI, step by step
Describe your business, give it a name, fill the options that matter, press Generate site and make your first change by chat. Every screen of the website generator, shown in order.
Sites4 min readUpdated
This guide shows you how to create a website with AI in OneCraft, from an empty generator to your first change in the builder.
The generator needs two things: a description of what you do and the name people know you by. Everything else is optional and only brings the first version closer to what you have in mind.
Before you start
Have three things ready: one or two sentences on what you offer and who buys it, the pages or features the site must have (a price list, a booking request form, opening hours), and your contact details. If you already have an old site, a Google Business listing or a social profile, keep the link handy too. OneCraft can read it for your services and hours.
From the dashboard, click Website & app, then Build with AI in the Create a website or app dialog. The generator opens on Create a website with AI, with Website selected under What are you making?. Pick Mobile app instead only if you want a phone app; a site stays a website or an app for good. The app route is covered in how to make a phone app with AI.
Describe the business
The first box asks What do you do, and who is it for? Write it the way you would explain your business to a new customer: what you sell, who it is for, where you work and what the site has to do. The counter under the box allows up to 3,000 characters, but a good paragraph is plenty.
Then fill Business or site name. Both fields carry a Required tag. If one is empty, Generate site will not start and the field shows a short message, such as “Describe what you do and who it is for.”
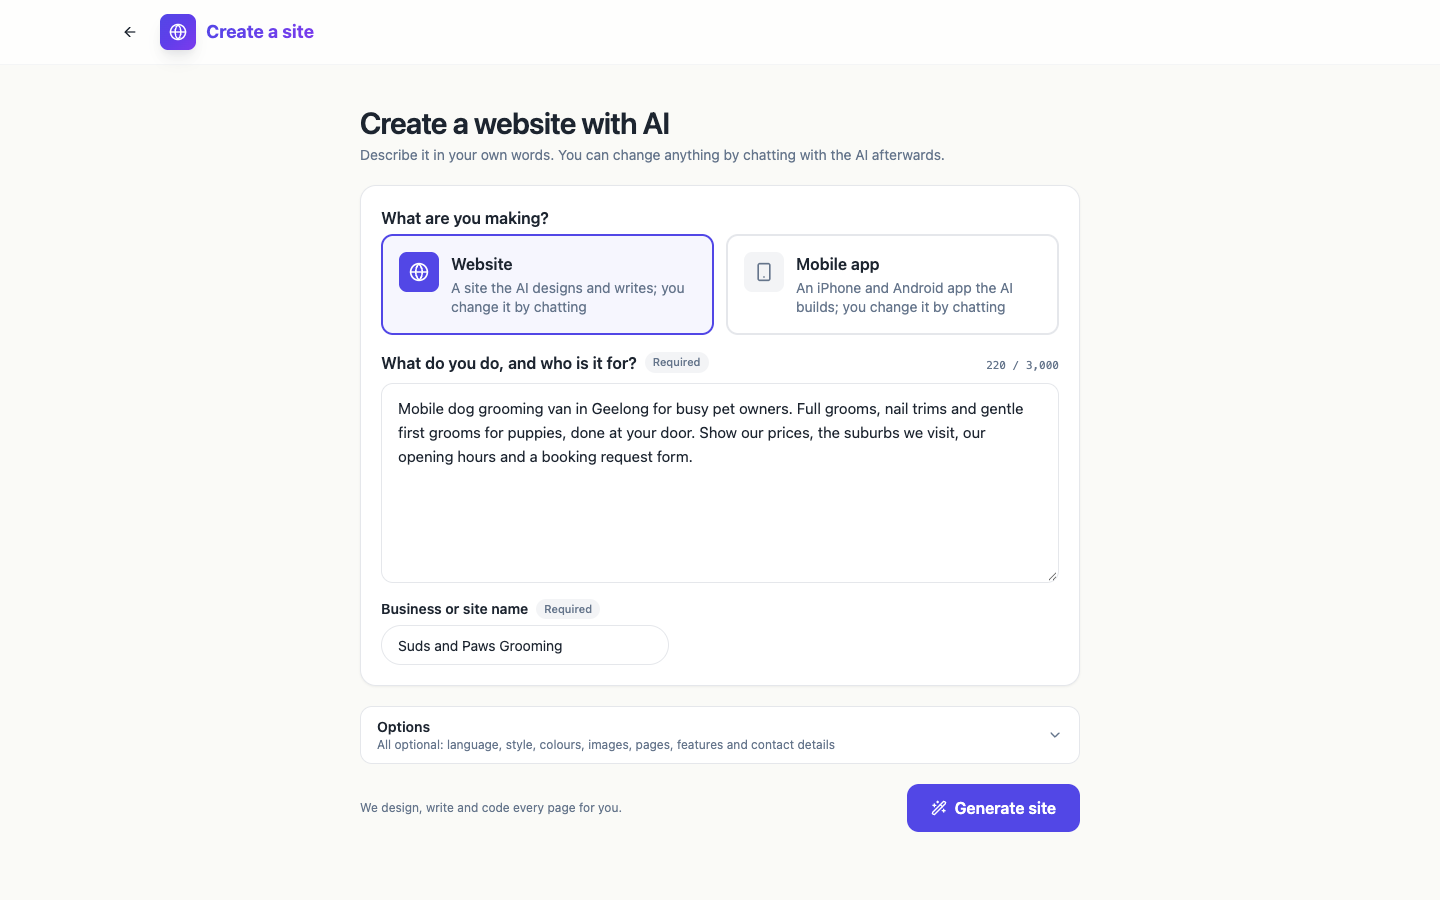 A description that names the services, the area and the booking request form gives the AI what it needs for every page.
Options worth filling
Click Options (“All optional: language, style, colours, images, pages, features and contact details”) to open three groups.
Language and style holds a Brand kit picker, the Language and Tone of the copy, a Colours strip of palettes (or Auto), and Images: Stock photos (matching photos from Unsplash and Pexels), AI images (up to 6 generated images, the rest stock, which uses extra credits) or No images.
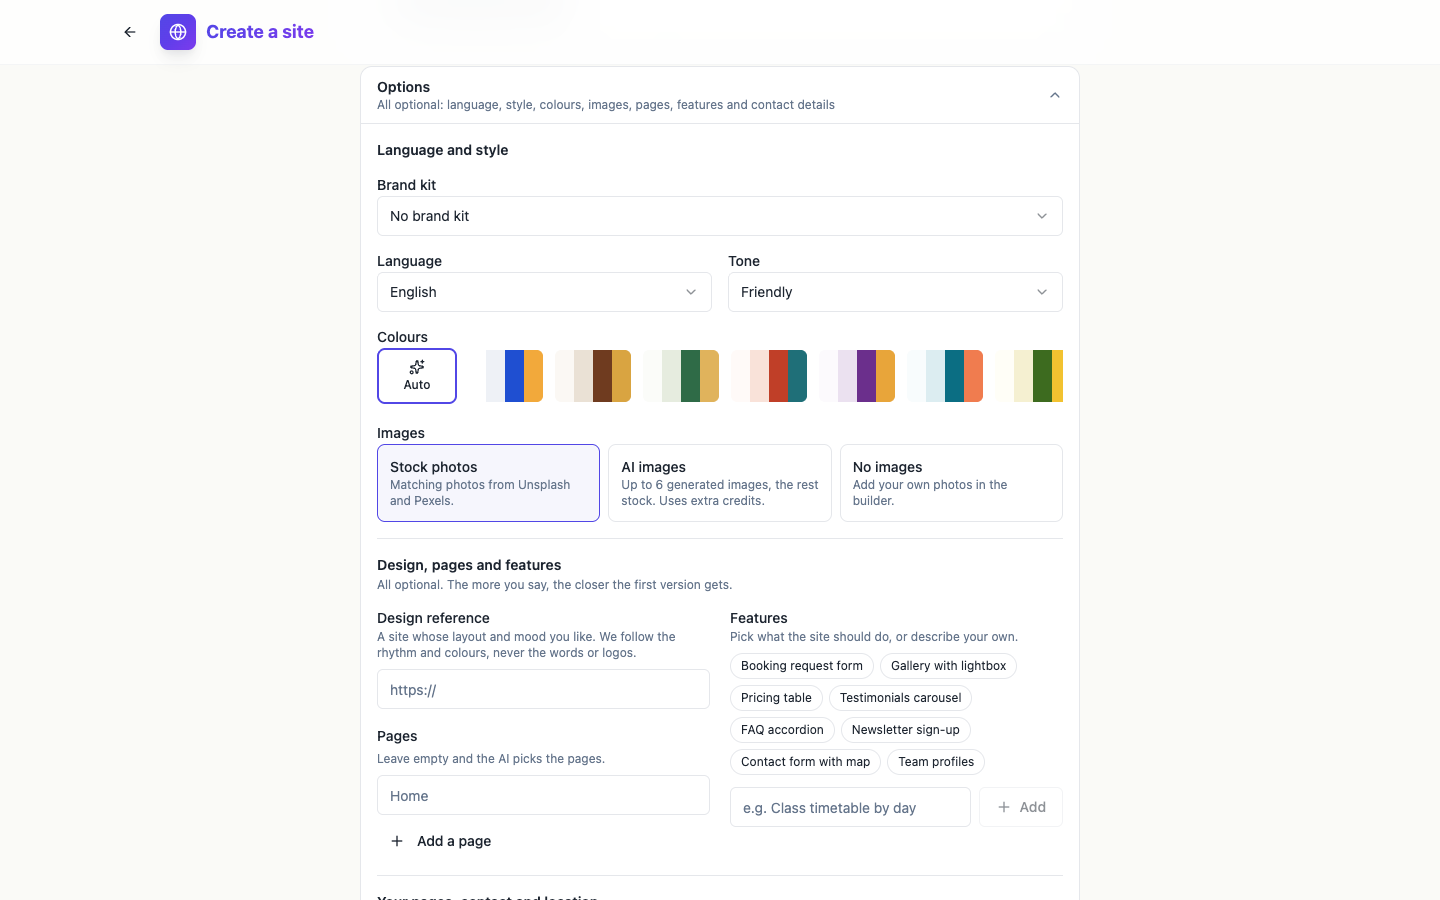 Pick a palette here, or leave Auto and let the AI choose colours that suit the business.
Design, pages and features takes a Design reference (the address of a site whose layout and mood you like; the AI follows its rhythm and colours, never its words or logos), the Pages you want (leave it empty and the AI picks them), and Features chips such as Booking request form, Pricing table, FAQ accordion or Contact form with map, plus a box to describe your own.
Your pages, contact and location is where the old site or listing goes under Your existing pages, along with your Location, Contact details and Social links.
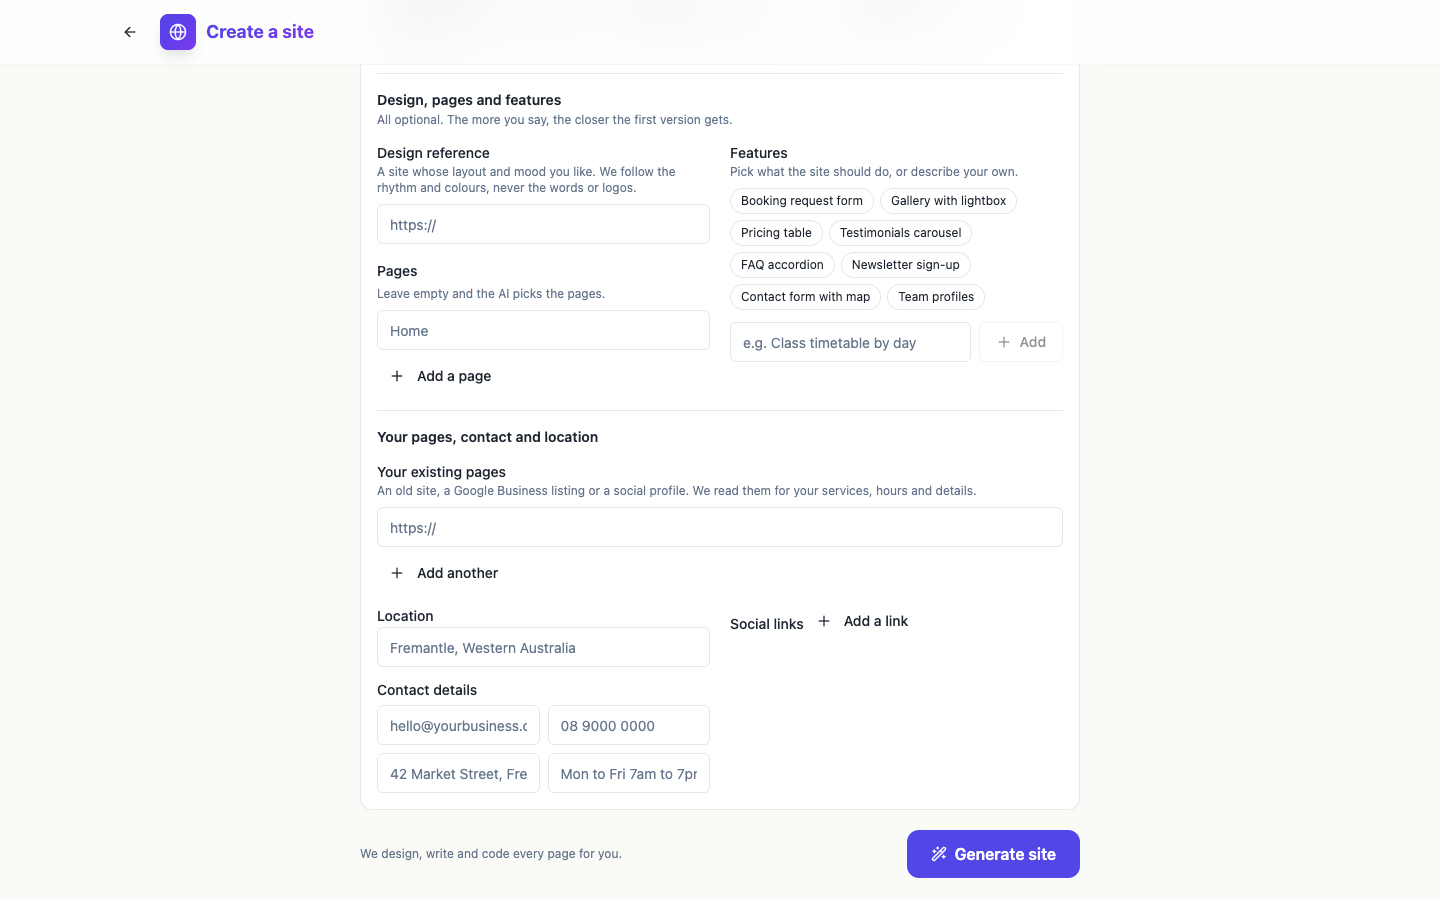 Contact details typed here end up in the footer and the contact page, so you do not have to add them by chat later.
While it generates
Press Generate site. A progress card replaces the form with the steps, the time so far and the files being written, and notes that it “takes five to ten minutes”. Keep the tab open. When the site is ready, the builder opens on its own.
Your first change by chat
The builder has three columns: Chat and Files on the left, the preview in the middle and the publishing panel on the right. Above the preview you can switch between phone, tablet and desktop widths.
Read through every page in the preview first. Then type what you want changed in the chat box (“Tell the AI what to change…”) and press Enter. Be specific: one page or one section at a time works better than a list of ten changes.
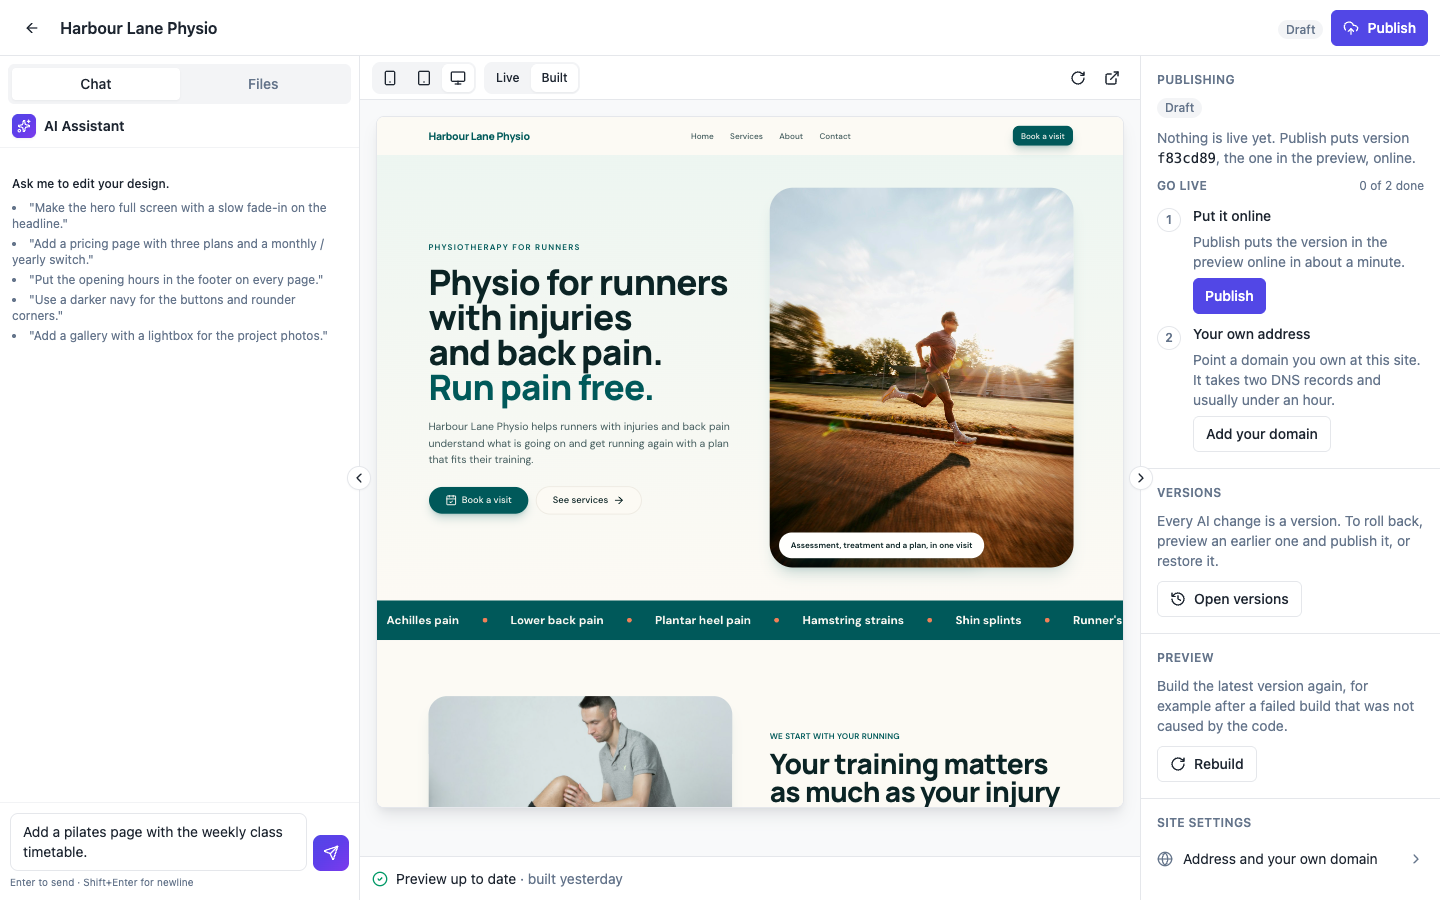 Ask for one clear change at a time. Each one becomes a new version you can roll back.
The edit a website with AI chat page has more on what the chat can change.
What it costs and what comes next
A new site costs 1 credit, and the generation is billed by the work it takes; a typical website came to about 14 credits when measured. The free plan builds and previews; publishing is part of the paid plans.
Next, check the site on a real phone with how to preview my website on my phone, then put it online with how to publish a website made with AI. The AI website generator page explains what the generator builds.
Ready to try it yourself?
Start free. Describe what you need and let OneCraft do the first draft.
Get startedSee it in the product
More sites tutorials
- How to make a phone app with AIPick Mobile app in the generator, base it on one of your websites or not, describe what it should do, press Generate app and check every tab in the phone and tablet frames.
- How to install my app on my phone for testingBuild a test version of your app with Expo, scan the QR code on Android or add your Apple account for iPhone, and install the real app without a store. Costs and limits included.
- How to preview my website on my phoneCheck your website at phone width in the builder, then open the preview link on a real phone before you publish. What the 15 minute link does, and how apps differ.